- Get link
- X
- Other Apps
In this project, we are going to make an Arduino Temperature logger that will get the temperature value from the LM35 temperature sensor and the time from the DS3231 Real Time Clock module. Then we will store these values in the SD card file using the mini SD card Module. After that, we will access this file from a PC and create a chart of these values in the Microsoft excel.
Required Components
The components required for this project are as follows
- Arduino Uno
- DS3231 Real Time Clock
- Mini SD card module
- LM35 temperature sensor
- Connecting wires
- Breadboard
Circuit Diagram
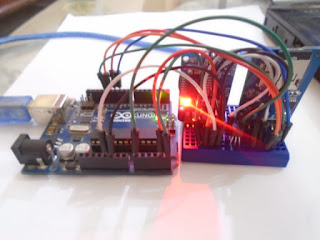
Make the connections for the DS3231 time clock with your Arduino as shown below
- GND of DS3231 to GND on the Arduino
- VCC of DS3231 to 5V pin on the Arduino
- SDA of DS3231 to A4 on the Arduino
- SCL of DS3231 to A5 on the Arduino
Make the connections for the SD card module with your Arduino as shown below
- CS of mini SD card module to digital pin 10 on the Arduino
- SCK of mini SD card module to digital pin 13 on the Arduino
- MOSI of mini SD card module to digital pin 11 on the Arduino
- MISO of mini SD card module to digital pin 12 on the Arduino
- VCC of mini SD card module to digital 5V on the Arduino
- GND of mini SD card module to digital GND on the Arduino
Make the connections for the LM35 temperature sensor with Arduino as shown below
- VCC pin of LM35 to 5V pin on the Arduino
- OUT pin of LM35 to A0 on the Arduino
- GND pin of LM35 to GND on the Arduino
How Does It Work?
The LM35 temperature sensor gives the output in analog form. We need to convert this output using the ADC to be able to measure the temperature. The Arduino has a built in ADC through which we will convert the output of LM35 into a temperature value.
The DS3231 time clock module works with the Arduino through the I2C communications. So, we just need to connect the SCL and SDA pins on the DS3213 with the Arduino and the module will start to communicate. The module has a separate battery which makes it able to run even when it is not powered by the Arduino.
The SD card module is then used to store the temperature and time in the SD card. The SD card module will open the SD card and store the data in it. After that, we will open this file on the PC and make a graph using these values in the Microsoft excel.
Note: If you are using the DS3231 module for the first time, then you will have to set the time and data in it. To do that, change the time and date in the code according to your time and upload the below code
Time Set Code
#include <DS3231.h>

DS3231  rtc(SDA, SCL);


void setup()

{

  rtc.begin();

   rtc.setDOW(WEDNESDAY);

  rtc.setTime(12, 0, 0);

  rtc.setDate(1, 1, 2014);

}


void loop()

{

}
Code
#include <SD.h>

#include <SPI.h>

#include <DS3231.h>

File data_file;

DS3231  rtc(SDA, SCL);


const int lm35_pin = A0;

int temperature;

int chip_select_pin = 10;     //pin 53 for arduino mega 2560


void setup() {

  Serial.begin(9600);

  rtc.begin();

  pinMode(lm35_pin, INPUT);

  pinMode(chip_select_pin, OUTPUT);

  if (SD.begin())

  {

    Serial.println("Initialization Successful. Ready to use");

  } else

  {

    Serial.println("Initialization failed. Check your pin connections or change your SD card");

    return;

  }


}


void loop() {

  temperature = analogRead(lm35_pin);

  temperature = (temperature*500)/1023;

  data_file = SD.open("test.txt", FILE_WRITE);

  if (data_file) {

    Serial.print(rtc.getTimeStr());

    data_file.print(rtc.getTimeStr());

    Serial.print(",");

    data_file.print(",");

    Serial.println(temperature);

    data_file.println(temperature);

    data_file.close();

  }


  else {

    Serial.println("error opening your SD card file. Try again");

  }

  delay(3000);

}
Code Explanation
First, we have included the libraries for the mini SD card module and the DS3231 time clock module. The SD card module works with the Arduino through the SPI communication, so we have included the SPI library. After that, we initialize two variables for using the library functions.
#include <SD.h>

#include <SPI.h>

#include <DS3231.h>

File data_file;

DS3231  rtc(SDA, SCL);
In the setup function, we started communication with the SD card module. If everything works fine, then the Arduino will print “Initialization Successful. Ready to use” on the serial monitor, or else it will print “Initialization failed. Check your pin connections or change your SD card”.
if (SD.begin())

  {

    Serial.println("Initialization Successful. Ready to use");

  } else

  {

Serial.println("Initialization failed. Check your pin connections or change your SD card");

    return;

  }
The LM35 temperature sensor gives us the output in analog form, so first, we need to convert this analog output into temperature. Then we open the SD card file “test.txt”. If there is no file of that name, then the Arduino will create it. After opening the file, the Arduino will print the time and temperature in it.
  temperature = analogRead(lm35_pin);

  temperature = (temperature*500)/1023;

  data_file = SD.open("test.txt", FILE_WRITE);

  if (data_file) {

    Serial.print(rtc.getTimeStr());

    data_file.print(rtc.getTimeStr());

    Serial.print(",");

    data_file.print(",");

    Serial.println(temperature);

    data_file.println(temperature);

    data_file.close();
Note
The file name you are going to select must be of the 8.3 format. The file name of the 8.3 format will be like this “data345.txt”, where the “data345” is the 8 character string and “.txt” is the 3 character extension. You cannot use a file name longer than this format. If you are using the SD card for the first time, it recommended to format it before using it.
How to Make a Graph in Excel
To make a graph in excel, open the Microsoft excel and go to data menu, click on the ‘from text’ button and select the SD card file. Then choose the delimited and click next, after that, choose comma and finish the wizard.
Now, select all the data and go to insert menu and click on ‘Line chart’. This will create a chart for us.


Comments
Post a Comment